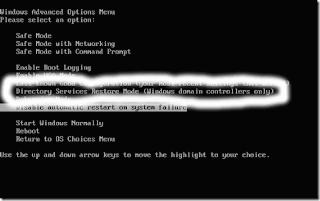
 1. Reboot the domain controller.
2. During startup, press F8 when prompted, and then select Directory Services Restore Mode (Windows DCs only) from the Windows Advanced Options menu. Press Enter.
3. Choose the operating system that should be started. Press Enter.
4. When the Safe Mode logon prompt appears, enter the appropriate local administrator account information, and then click OK. Click OK when a message appears, advising that Windows is running in Safe Mode.
5. Click Start, All Programs, Accessories, System Tools, and then click Backup.
6. On the initial page of the Backup or Restore Wizard, click Next.
7. Ensure that the Restore files and settings option is selected on the Backup Or Restore page. Click Next. 8. On the What to Restore page, choose the backup which you want to use for the Primary restore process. Click Next.
9. Click Advanced.
10. On the Where to Restore page, leave the default setting of Original location, unchanged, and then click Next
11. On the How to Restore page, choose the Replace existing files option. Click Next.
12. When the Advanced Restore Options page appears, enable the When restoring replicated data sets, mark the restored data as the primary data for all replicas checkbox. You can leave all other default settings on the Advanced Restore Options page unchanged.
13. Click Next.
14. Click Finish to start the Primary restore of Active Directory.
15. Reboot the server.


0 comments:
Post a Comment